


Classic
Louisiana Jon boat
Wooden Boat
Plans
Yes, Christina, there are fish in the Reservoir!!!
|
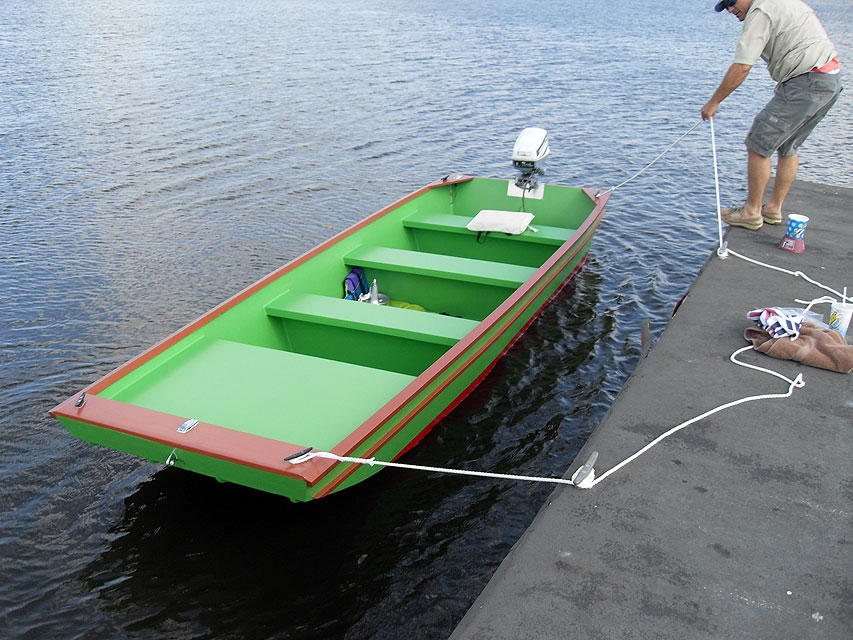
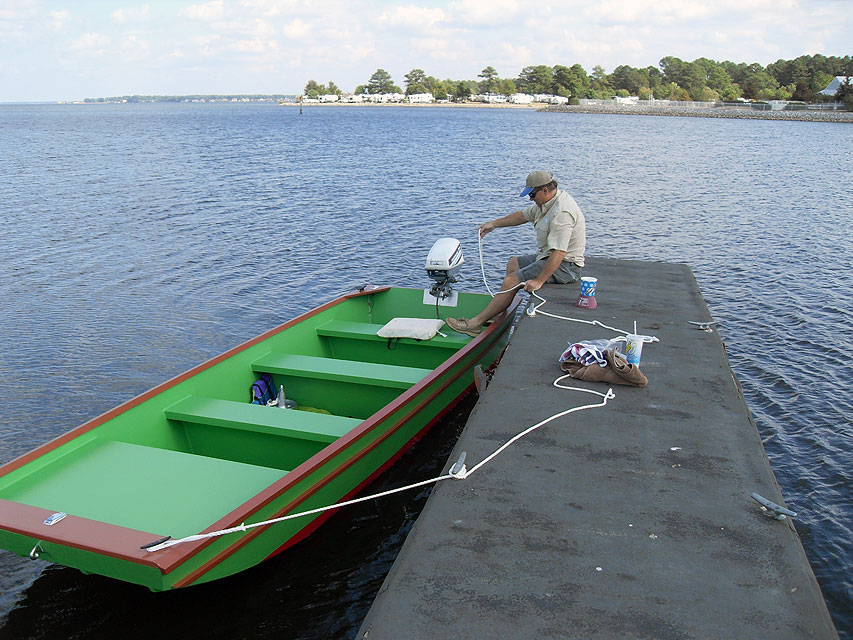
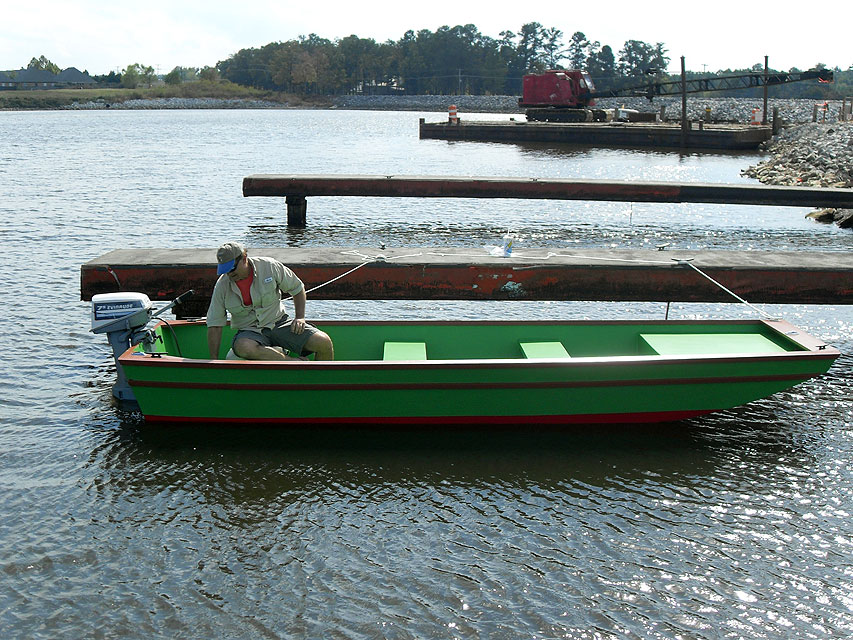
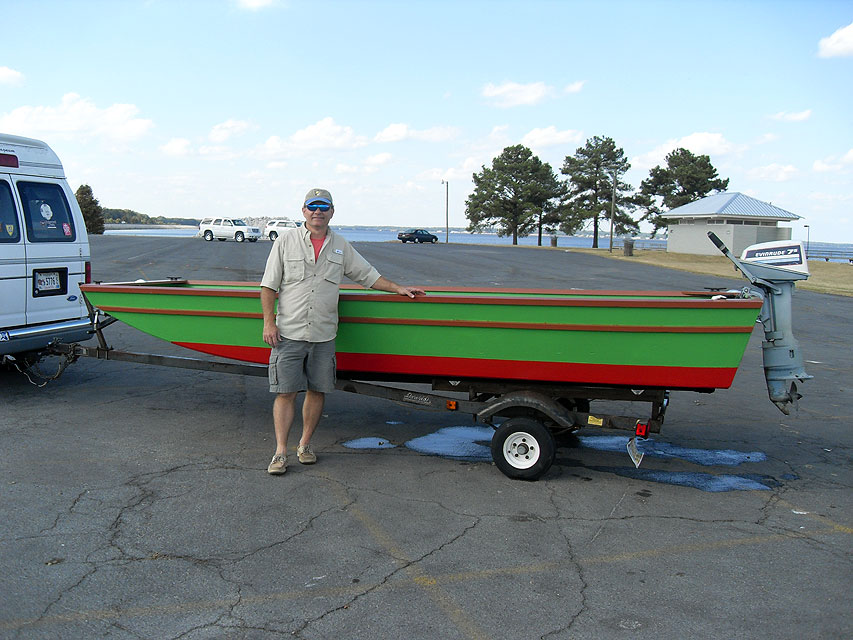
My daughter and I traveled together to school and work for years crossing the Ross Barnett Reservoir in Jackson, Mississippi, checking out the fishermen in their boats strung out along the levee rocks. We never saw anyone land a fish, thereby causing my daughter to conclude that there were no fish in the reservoir, only lonely ducks and a hungry alligator on the prowl. I assured her that there were fish there but she would not believe me. I decided then to use my wood working skills to build a boat so we could fish and resolve this question of whether or not there were any fish to be had. |
(click images for a larger view)
|
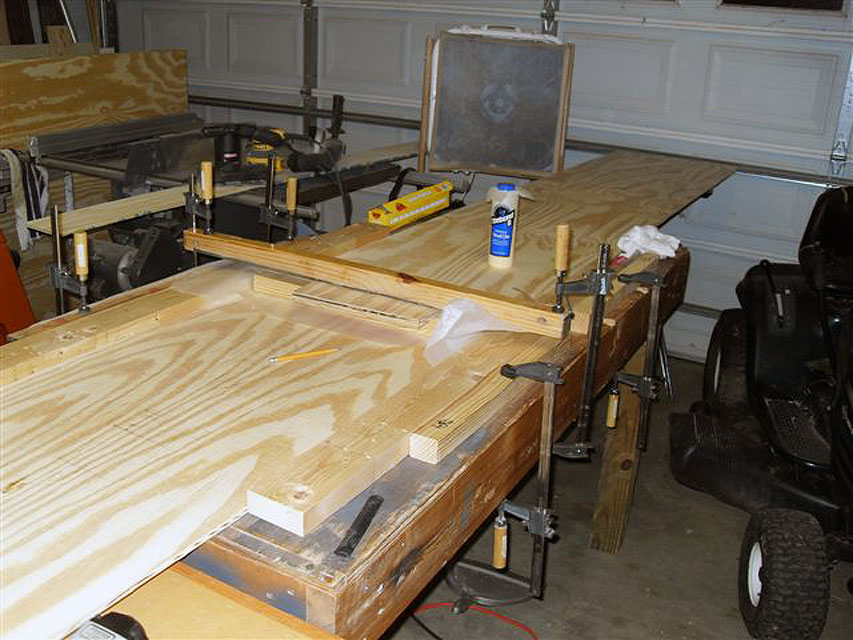
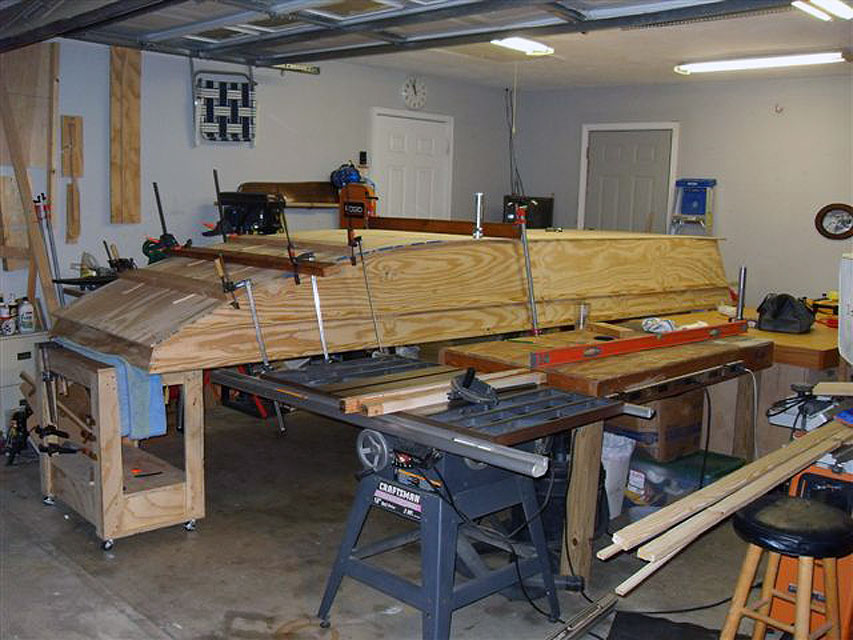
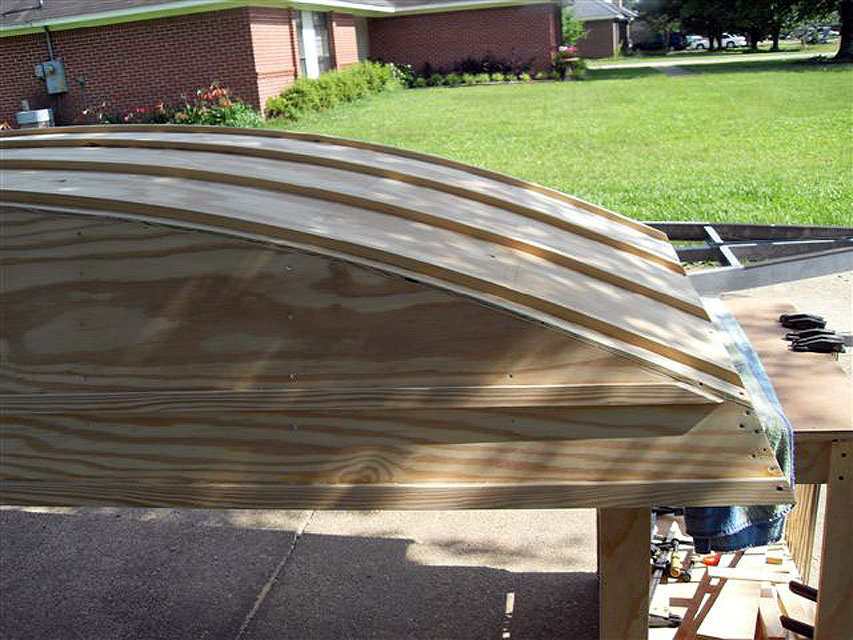
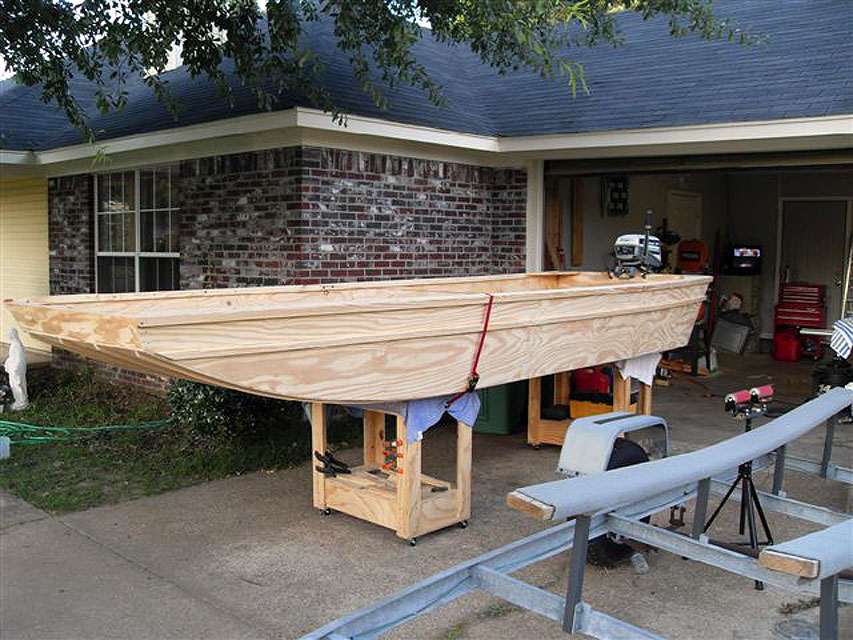
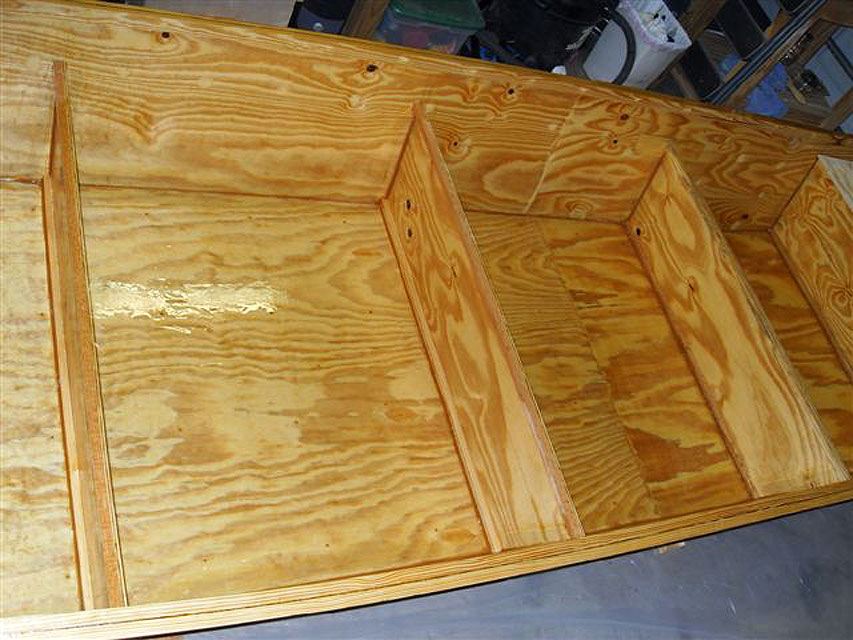
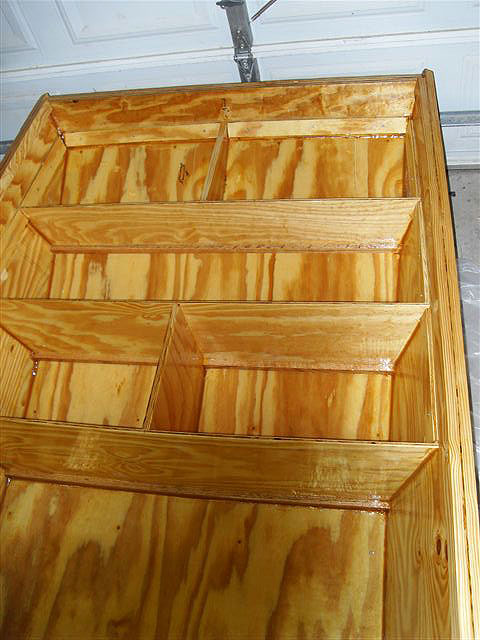
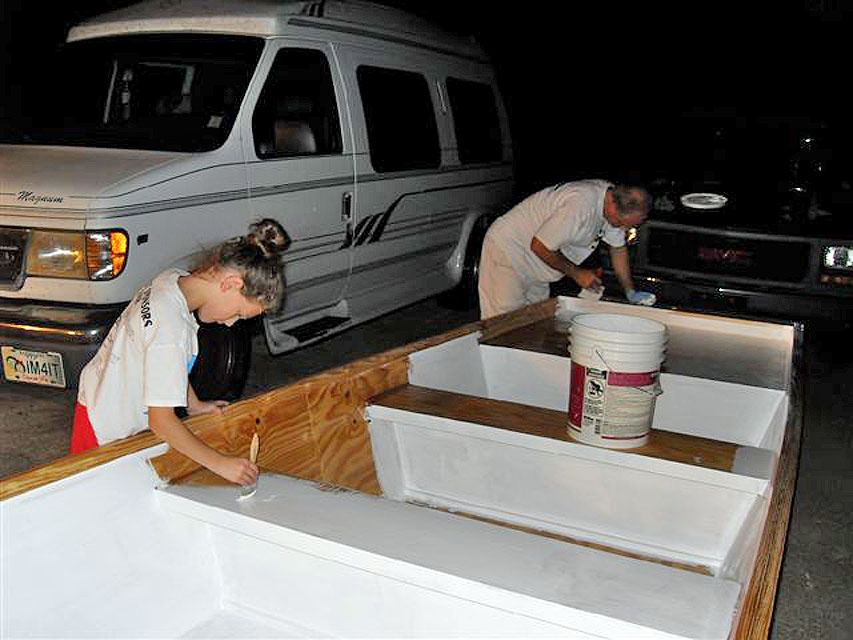
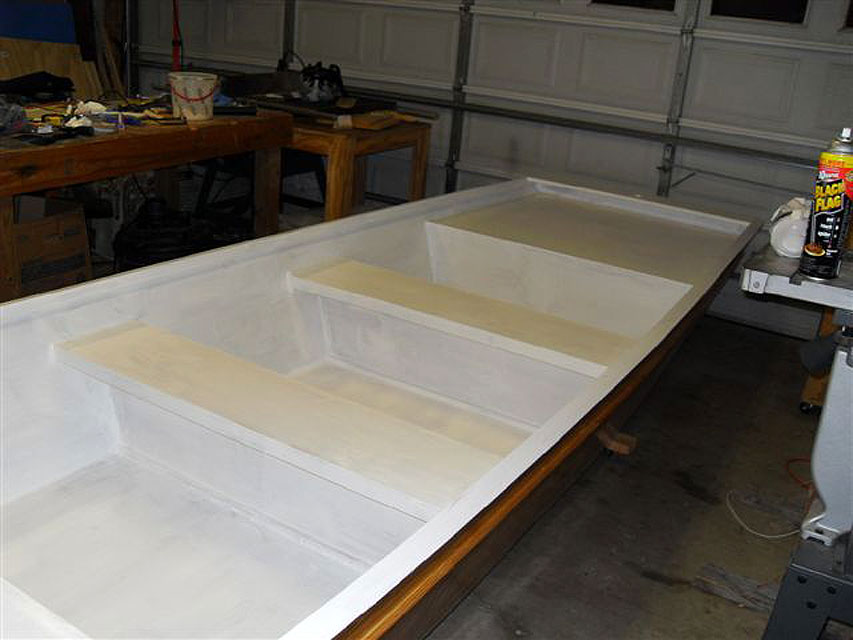
I began to look for a set of plans that would fit my needs. A fellow parishioner told me about a pirogue boat set of plans he purchased from a website called UncleJohns.com. That night I perused your site and decided that your Jon boat plans were just what I needed. In November 2009, I purchased your plans online and printed off the electronic version. Now, I am sort of a perfectionist, thereby studying every page of the plans, including measurements and the like before I would begin the project. I studied the plans for several months, modifying dimensions for length and width, deciding on the type of wood to use, the hardware to be used and the layout of the boat. I didn’t begin construction until the end of April 2010 due to Christmas, winter and a 25 year anniversary cruise in March for my wife and me. Below are some notes on my construction and completion of the project. I decided to build the boat 16 feet long by 4 feet wide by 21” tall for stability. Your photos and other builders helped with this decision because our reservoir can be quite choppy at times. I also decided on using 3/8” exterior grade plywood from Lowe’s for the sides, floor, seats and bulkheads. The transom and bow plates are ľ” exterior grade plywood doubled to 1 ˝” inches thick since I knew I was going to install a 15 to 20 hp motor on the back. The rub rails and side rails were ripped from 16 foot long 1 by 4 southern yellow pine (SYP) from Lowe’s thereby eliminating the need for scarfing. The runners on the bottom were also ripped from 1 x 4 x16 SYP squared, again, no scarfing. The gussets were from scrap shelving board that I had leftover from a previous project. I thank you for the suggestions of using RAKA epoxy. I talked several times with Larry and Michael at RAKA who were very willing and able to answer all of my questions since I had never used epoxy and fiberglass prior to this. I purchased what I needed from them, and everything was delivered within 5 business days on schedule. I used the slow setting hardener (606) due to the high heat in the South and the 9 oz cloth. All told, I ended up purchasing 3.5 gallons of resin, 1.75 gallons of hardener, 6 mixing pots, 2 spreaders, 5 lbs flour and a bag of graphite. I had on hand in my shop 2 quarts of resin and 1 quart of hardener from West Marine’s System 3 epoxy that I did use for filleting the runners. Here’s a tip: I captured the wood dust from my orbital sander and the dust from ripping the wood on my table saw. I then used a cheap wire strainer from Wal-Mart that you would use to strain tea from a busted bag and sifted through the collected dust. This was used in most of the filleting and thickening necessary during the epoxy process. Other materials and supplies used during the project and where they were purchased: - Lowes: TITE Bond II wood glue, 4” and 2” nylon bristle paint brushes, plastic drop cloth to cover garage floor for epoxy protection and reused during painting process, blue painter’s tape - Harbor Freight: a box of 2 inch chip brushes, a box of 4“ chip brushes, 2 boxes of nitrile gloves for epoxy work, - Wal-Mart: two packs of craft tong depressors, 16 oz and 3 oz plastic cups for mixing small amounts of epoxy, and I am sure a few other things I have forgotten. When building a boat this big, you will use more plywood due to the fact that the tops of the bulkheads are greater than 48 inches. I started out with 4 sheets but ended up buying 4 more. Draw out your needs on paper first. I used glue and screws to attach the sides to the bow plate, transom and bulkheads. Prior to attaching the bottom, I angled the edges with a block plane for better gluing surface contact. I also added a ľ inch oak stock nailer to the bottom of the bulkheads for more nailing and gluing surface area. I used glue and screws to attach the bottom to the bow plate and transom and I used glue and brads to attach the bottom to the bulkheads. Most screws were removed and filled in prior to the epoxy phase of construction. The epoxy process was nerve racking and challenging, but became easier after doing it for a while. I probably used too much epoxy in the beginning however it came out fine. My epoxy process was to seal the whole boat with a layer of thin epoxy. The seams were all taped with 9 oz cloth strips, the bottom on the outside was then covered with a 16 foot by 60 inch sheet of 9 oz cloth, filled in with two layers of epoxy to fill the weave and the inside bottom was covered with 9 oz cloth cut between bulkheads and filled in with 2 layers of epoxy to fill the weave. Lastly, a final coat of epoxy was used to smooth out the bottom, sides and seats. This gave a total of 4 coats on the bottom, and two coats on the sides, seats and bulkheads. Also, the deck was covered similar to the bottom. I put the runners on the bottom of the boat before I put the epoxy and cloth down. This was a mistake since the cloth would not route easily over the runner even with filleting. I eventually cut the cloth at the base of the runner and faired it up the side of the runner. I should have put the runners on after the cloth layer and prior to the last couple of coats of epoxy. Priming and painting was done with some leftover exterior Behr latex/water based primer that was used when I repainted our house last year. I had about 2 gallons leftover from a 5 gallon bucket. Exterior grade latex paint was used on the boat. Valspar Satin was used for the green and brown trim and Behr High Gloss Pure Red for the bottom and bootstrap. The Valspar did not dry very well, which I believe to be a product problem after reading many forums. After a month and a half, it still has a slight stickiness to it. The Behr dried very well. I used a paint roller on the interior and exterior however on the outer sides I used a brush on the final coat. I wanted the paint to have a wood grain elongated streak look to give the boat an old wooden painted look. Since I enjoy the look of wood grain, I wanted the boat to look like the old boats my father and I used to rent on the Mississippi coast. Thanks for the plans and the experience. I had a blast building it. Many people dropped by while the boat was in the construction phase, and also when it was completed to say they enjoyed watching it being built. What a nice compliment. As the pictures reveal, “Yes, Christina, there really are fish in the reservoir.” Enjoy the pictures and video. Brandon, MS |
Henry also included two videos.
click to view
video #1 -
video #2